A Simple Guide to Business Invoicing

Creating Your Invoice
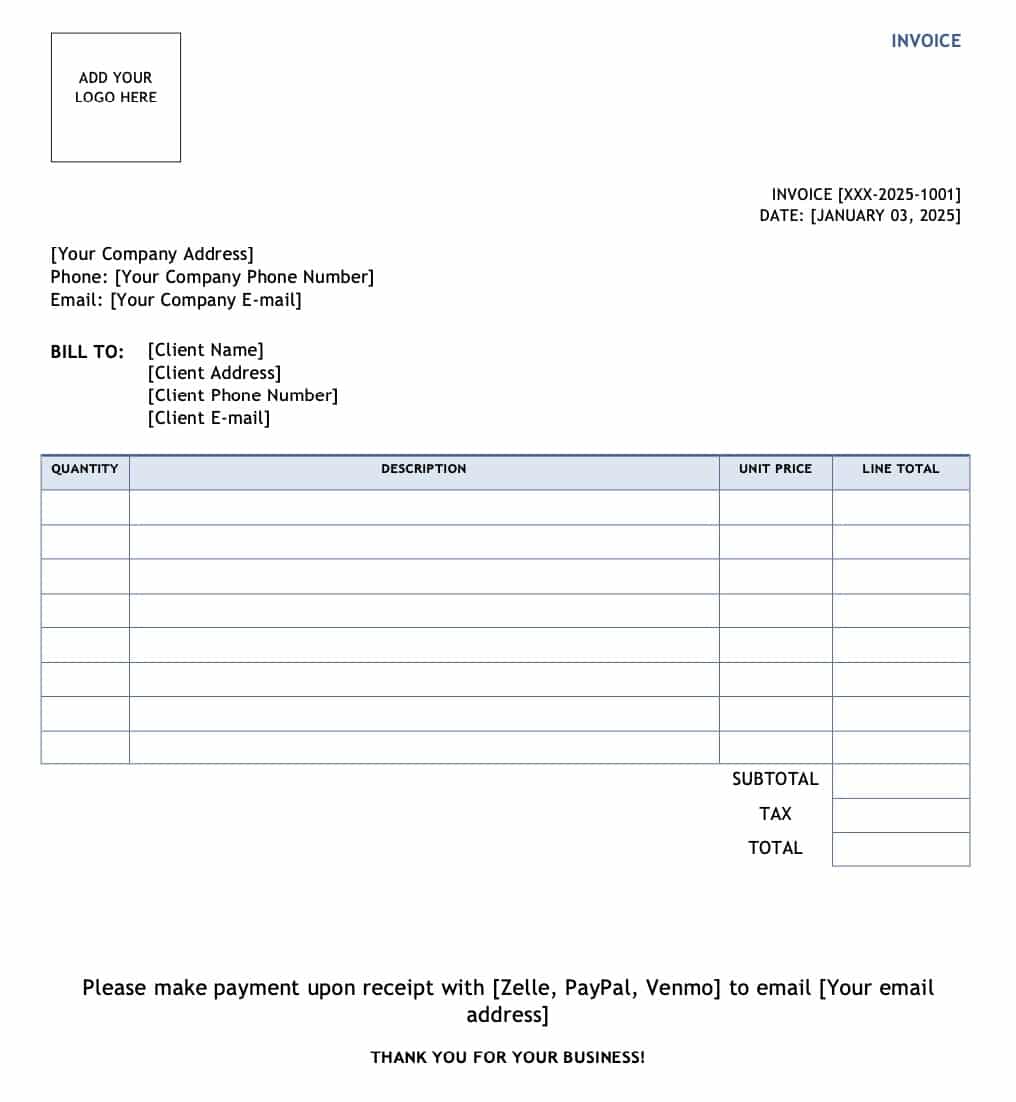
The best way to start is with a simple template. A basic Word document or a free online tool can work perfectly. Choose what is easier for you. I use a Word template for my business, you can download mine for free [Download the Invoice Template]. The goal is to make it clear, concise, and easy for your client to read.
Top Section:
- Your Business Information: Place your logo, company name, address, phone number, and website URL at the top (if you have one). This makes your brand instantly recognizable.
- Unique Invoice Number: Assign a unique number to each invoice. This is essential for tracking payments and staying organized. You can use a simple sequence (e.g., 001, 002) or a more detailed code (e.g., 2025-001-Smith).
- Date: Always include the date the invoice was issued.
- Client Information: Clearly list your client’s name, phone number, address and email address. This ensures the invoice is sent to the right person.
Middle Section: Detailing Your Services and Totaling the Amount
The core of your invoice is the breakdown of what your client is paying you for. Create an itemized list that clearly describes each service or product.
- Itemized Services: For each item, include a description, the quantity (if applicable), and the unit price. This transparency helps prevent questions and disputes.
- Subtotal and Total: Add up the cost of each item to get the subtotal. If you have any taxes or fees, add them here. Finally, provide the total amount due at the bottom.
Bottom Section: Payment Terms and Follow-up
This section is where you tell your client how and when to pay.
- Payment Due Date: Specify when the payment is expected, such as “Payment is due upon receipt,” “Net 30,” or “due at the time of final delivery.”
- Accepted Payment Methods: List the ways your client can pay you (e.g., Zelle, Venmo, PayPal, bank transfer). Make sure to include the necessary account information.
A Final Touch: End every invoice with a sincere “Thank you for your business” statement. It’s a simple, professional way to show your appreciation.
Save as a PDF
Before you send your invoice, make sure to save it as a PDF. This simple step ensures that your formatting stays exactly as you intended, no matter what device your client uses to view it. A PDF is easier to share via email, text message, or apps like WhatsApp, giving your clients a seamless experience.
Once you receive the payment, be sure to send a confirmation email or a paid receipt. This small step shows you are organized and helps your client keep their records straight. If you have social media, it’s a great idea to politely ask for a review if they were happy with your service.

